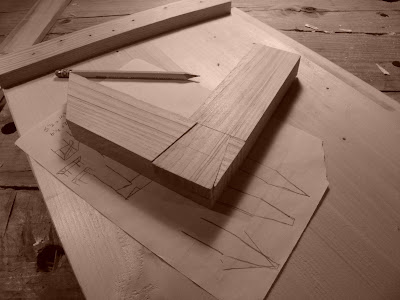
My friend recently spent a couple months in Nepal doing some volunteer work, and brought back a nice painting for her dad. The painting is very long and narrow, though, so it's difficult to find a frame for it. It measures about 5x15". I suggested finding one of those frames that is designed to hold a few 4x6" prints one above the other, but we decided on something else. Her dad happens to be the carpenter that I work for from time to time, and during slow January he is remodeling his kitchen. He is using a lot of Cherry wood, and has some scraps left over. I'm going to make a nice (hopefully) custom frame for the picture. My friend came over for a couple of hours yesterday with the wood and some tools her dad wants me to sharpen. The plan was for me to start working right then, but we started discussing some different options for the corner joints. My friend isn't terribly savvy about woodworking, so when I started mentioning different joints we could use, she was a bit lost. I decided to demonstrate on some Fir scraps the two joints I was thinking most about. This ended up being some good practice and it was also good to have a physical representation of the joints right in front of us, instead of the abstract concepts or pictures off the internets.


After she left I broke out my sharpening gear to take care of the blade on my Jack plane, the one that I mentioned is looking like a toothing blade. Now it leaves a surface like glass. I ground the edge down on a piece of Norton 3x 220 grit paper spray glued to a piece of 1/4" thick glass. I got the glass for free from the local glass shop, it was a scrap and the guy was nice. Just out of curiosity (I sharpen freehand), I checked the angle using my sliding bevel and my speedsquare, and found that I was grinding the primary bevel at about 21 degrees. Then I ground a small bevel at the very edge on a piece of 1200 grit paper, I'm guessing at closer to 30. I also polished the back to 1200 grit. I took out almost all of the camber on the 220 grit paper, just leaving the corners a little turned up to help reduce tracks. The whole operation took about 10 minutes. If I wasn't taking the camber out (or if I had started on 100 grit), it would have taken half as long at most. After the 1200 grit sandpaper, I carefully stropped the wire edge away on a leather strop loaded with green chromium oxide compound (.5 micron average particle size). While I had the blade out I took the opportunity to polish a little pastewax onto the sole.
A tip (this is probably already out there or common knowledge, but just in case...); If you spray the adhesive onto the sandpaper instead of the glass, less of it sticks to the glass when you change paper, making it easier to scrape off. I follow the directions on the can for a "temporary hold" and it always works fine for me.
Also, a note. The front edge of my bench is straight, not bowed, and the glass is straight on all edges, also not bowed. The distortion is due to my camera lens.

No comments:
Post a Comment