I've had my eye out for a good old plane iron for a while, and finally a couple of weeks ago I came across a wood bodied Jack or Try plane that wasn't in great shape with a good laminated, tapered iron. After I bought the plane and an axe, I gave him back the body and just left with the blade. Maybe he can sell the body to someone looking for a mantle decoration.
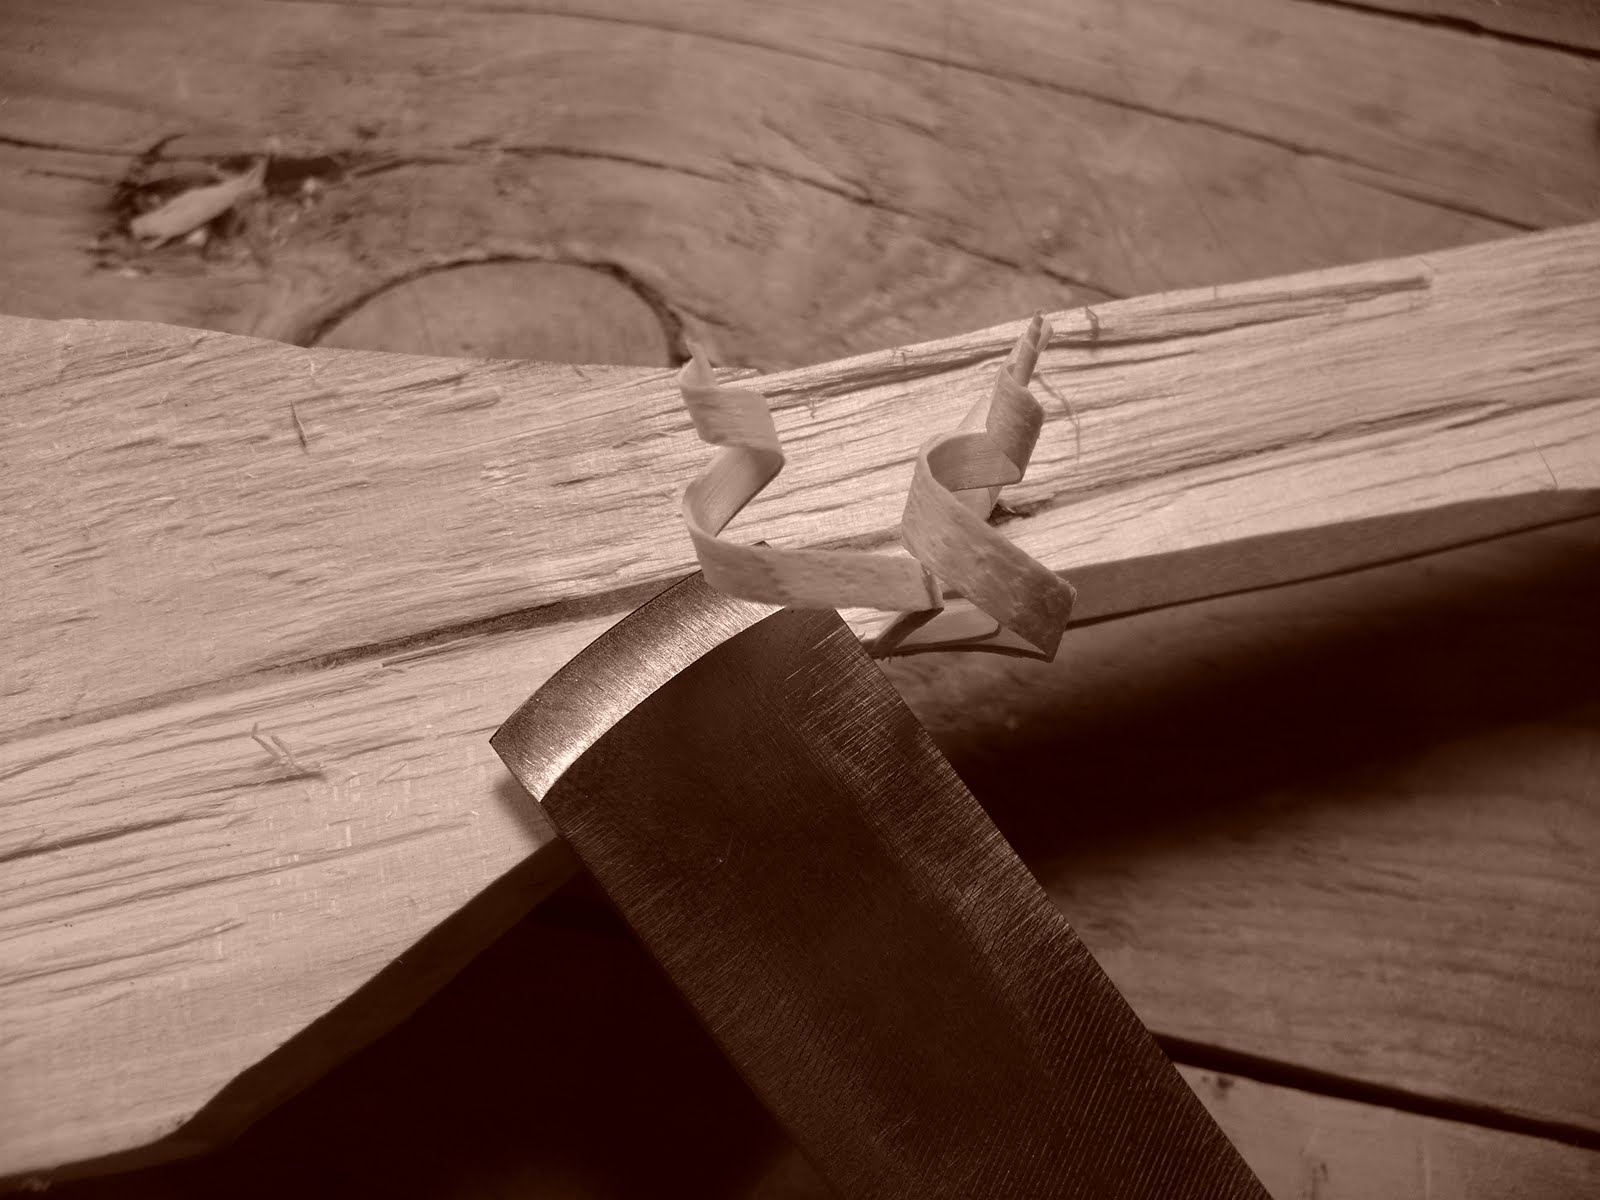
After I ground the iron, sharpened the bevel and got the back into satisfactory condition I started working on a body made from some Red Oak I saved from a house I worked on over the summer. I've been curious to try a Japanese style setup for some time, so that's where I started with my layout. The body is about 12" long, with the blade bedded at 45 degrees, or a tad less because of the tapered iron. I think I might scrap this body, the Oak is really brittle and even being careful I ended up with quite a bit of breakout in front of the mouth. The shavings aren't too bad, but I don't think it's worth trying to go any further with fettling it. I might try again with some Cherry or Maple that I have.
In other news, I went camping a couple of weeks ago up in New York, right by the Canadian border with some friends. The high for the weekend was about 5 degrees F, with nighttime lows close to -20. A few days before we went out one of the guys that's local to the area went in with a chainsaw and cut several piles of standing dead Ash and Oak for the fire. I think we went through just about all of it in the two nights we were there. We walked in a mile or so, most of us using sleds to carry our gear over the 8" of snow. I took three axes, my Gransfors carving axe, my 3.5 pound Snow and Nealley, and a 3.75 or 4 pound antique on an experimental handle. The antique ended up splitting all the wood for the weekend, since my S&N is ground pretty thin and would just get stuck in logs, and no one else brought a big axe. The experimental handle on the antique is Maple, with the growth rings oriented perpendicular to the way traditional wisdom says they ought to be. My reasoning for trying that is that most wood splits more easily across the growth rings, and the way growth rings are oriented in a common axe handle, it seems that they would be more prone to splitting. Anyways, the handle did alright, but toward the end a large section split off. I think Maple is perhaps not the best axe handle material, and the cold also negatively affected another guy's axe handle, so perhaps that was a factor in this case. Either way, I think it merits some more experimentation. Maybe sometime I'll put together a proper scientific test.
My camp:
Showing posts with label Shop Tools. Show all posts
Monday, January 23, 2012
Wednesday, December 21, 2011
Mahogony Square
A couple weeks ago I was at the lumber yard picking up materials for work when I spotted an unusual piece of wood in the box of bunker wood (the junk wood used to keep good lumber off the ground). My suspicions were confirmed when I picked it up and looked closer: a 3x4 of Mahogony (I can't tell which sort)! I could see it was glued up of two pieces, but still respectable pieces. I have been curious to see how it works, since I've heard that it's a good handtool wood. The piece I have is quite light, maybe lighter than a similar piece of White Pine, and the grain is pretty distinct.
I first ripped it down the glue line, leaving me with roughly a 2x3. A square seemed like a good simple project to get a feel for the wood. I ripped off a vertical grain piece for the blade, and used the original rip for the stock. I sawed out the sides of the bridle joint, then chiseled the waste. This wood is pretty soft and easy to saw, but the end grain also crushes fairly easily with chiseling and even planing. It's hard to get a good polished finish on the end grain with a plane like I'm used to with the other woods I've worked.
I did a better job of laying this one out than my old one, so it was really square right away, without any fiddling. I ran out of time so I didn't glue it, that will come later. The proportions look funny to my eye, but as long as it works I don't really care.
I also bought an inexpensive micrometer a while ago, and I have been measuring some of my plane shavings. I can get my block plane to take a shaving as thin as .001 (one thousandth of an inch) but no thinner. I haven't seen the thinnest I can make with my #8 yet, but I bet I can match the block plane.
Thursday, April 07, 2011
Working on Wide Boards
The way I cut my boards to final length may be unusual, or it may be very common. I really don't know because I don't remember ever reading about how anyone else does it (though I haven't read very many of the classic woodworking texts). Anyways, this is how I go about it:
I typically rough cut an inch or two oversize, depending on how my material works out and whatever other factors are in play. Then (if not already done) I will joint one edge and shoot one end of the board off of that. I pull my measure from the shot end, mark for square and saw about 1/16" over. This allows for a little slop in case my saw has had a few too many to drink. I then shoot to a hair shy of my line, being sure to reference off of the same edge. This makes sure that my two ends are parallel, and square to the face edge. Once I have all the pieces that are to match through this process, I carefully line them up to see how they compare. I adjust their length with a few more passes of the plane until they match perfectly.
In the photo above you can see that the 14" wide panel for the bottom of the DVD cabinet I'm building takes up just about my whole shooting board. Luckily I didn't have to make a new shooting board for this project, but if it were any larger I would have. With longer planks like this, you can see that I have a couple of boards propped under the end to keep the board flat on my shooting board. This takes a lot of strain out of the left hand, and lets me focus on shooting.
Below, you can see the trouble in flattening and smoothing a 14" wide panel on an 11" wide bench. Luckily it's not that much overhang, so it's manageable. I opened up my vise some to provide support, and used my Veritas Wonder Dog to secure the panel against my planing stop. This allowed me to use my #5 Jack diagonally across the grain to bring down the hump, and then I had no problem using my block plane to smooth things up.
Where I did run into trouble was on the other side of this panel, where I had to plane out a dish. I ended up getting rid of the Wonder Dog, and planing straight on each edge of the panel into the stop. I simply shifted the board back and forth to support wherever I was planing.
If I were working something much wider (but still not wide enough to reach across to the back of my tool well), I could clamp a 2x4, 4x4, or whatever else would be necessary into my leg vise, and if needed secure it against the other leg with a holdfast or bar clamp, depending on the thickness of the piece. This would effectively give my a wider solid benchtop to work on. I think for my next bench I might for a wider bench top, but I'm not sure yet. I suppose it will mostly depend on what I end up doing more of when it's time for a new bench. In an ideal world I could have a couple of benches, like Tom Fidgen, one like this, and then one with a really wide solid top for working panels and for assembly. In an ideal world I would also win the lottery...I suppose I should stop complaining. Haha!
I also decided that smoothing this big panel would be a good job for a cardscraper, so I made a couple real quick from a dull impulse hardened Japanese saw blade I had laying around. I cut the blade into two pieces, ground most of the teeth off, more-or-less jointed the edge, ground a roughly 45 degree bevel on one side, polished the flat side on my sandpaper setup to 1200 grit, polished the bevel to the same (bringing it closer-to-but-still-not-quite-90 degrees), and put them to work. They worked pretty well, but I still feel like the finish isn't quite as gleaming as I get off a sharp plane. I need to make myself a nice comfortable wood bodied smoother. This block plane is simply difficult to hang on to.
Once I had the parts for the primary carcass cut, I stood them up to get an idea for how the thing would look. It should be pretty nice when it's all said and done. The boards are all three feet long, to give you some scale. This nice thing about having a low ceiling is that I can brace the thing together by applying a spreading clamp against the ceiling joist (difficult to see in the photo). So I think that brings the tally to one benefit of low ceilings, five thousand reasons to still hate them.
Tuesday, April 05, 2011
New Vise Chop
Today I took a little time to replace the chop on my vise. Now it's a full 3 1/8" thick (slightly more than twice as thick as before), and I decided to leave it just shy of 8" wide all the way to the floor. This chop is made from some species of Maple, probably "soft Maple" as I've heard it called. It has an ever-so-slightly sprung inner face, almost not detectable. The wood is still semi-green, so I glued the wood up to fight itself if it moves, the goal of which is to keep it stable dimensionally. Hopefully the Gorilla Glue won't let go!
You can also see the full length planing stop that I made from some Yellow Pine. My other planing stop is about 2 feet long, and scrub-planing anything longer was nearly impossible. My new stop limits the width of my bench top to 8 inches, but I rarely-if-ever need to plane anything wider, and of course it's removable (secured in place with 3/4 inch dowels).
You can see my old sissy vise chop below, made from a 2x6 Doug Fir. I had to set the parallel guide a full inch more than the stock thickness, so that when the wood bowed to give full contact, I would have sufficient pressure. There shouldn't be any such issues with the new chop. For a quick test, I clamped up a piece of 6/4" Curly Maple about 3 feet long in the vise and jointed one edge, no signs of slipping at all.
Wednesday, February 09, 2011
Finished Picture Frame
I finished up the picture frame the other day and delivered it. To finish it I glued the joints together, gave it a few coats of Danish Oil, and matted the picture.
Below are a couple pictures of a new beam I made for my marking gauge, in an attempt to cut out the rabbets in the frame, but the Cherry was too hard and brittle for that idea to work. I made the blade from a hacksaw blade, which it turns out is a little on the flexible side. The blade kept bending out and following the grain. At some point I'll make a new blade out of some thicker steel.
The nice thing about this style of marking gauge is that it's not too difficult to quickly whip up a new beam if you have a special need. I'm considering making a couple of beams with pins set for my most commonly used mortise chisels. It might get done in a couple of years.
The other day, I also finally took the time to grind on my hook knife. It's the Frost small diameter hook knife, which I got over the summer. I sharpened it up then, but I was never 100% satisfied with the grind that it had. It performed well enough, and got the job done, but it was getting dull again so I figured I might as well do a good job as long as I had nothing better to do for a few minutes. Hook knives are difficult to grind, but not impossible. I ended up thinning out the grind right behind the edge, which reduces the resistance the edge meets in the wood. I'm much happier with the knife now, but I'd still like to get a hold of one of Del Stubbs' hooks. Those things are beautiful.
Monday, January 31, 2011
Framesaw
I decided on an open mortise and tenon for the corners of the frame, and ended up cutting two of them a tad on the loose side, so it was tricky holding the frame together and fitting the blade by myself. I took the saw for a test drive resawing a few feet of 2x4, and it worked okay. Better than anything I already had, but it wanted to wander in the cut even when I couldn't get the blade any tighter.
Sunday, January 23, 2011
Framesaw Pieces
You may notice that my batten is clamped at the end of my bench because in it's usual place the board I was planing would hang off the end. This worked well, and saved me having to drill out holes to accept the pins on the batten.
Just for fun, I decided to do a rudimentary strength test on the Maple bars. I placed a stool near my bench and used a Maple bar to span the distance, with only about 3/4" at each end. I put my full 190 pounds on the center of the bar and bounced up and down, with no noticeable flex. I think these will be fine for the saw. When I performed a similar test (with the stool moved farther away) with the mystery wood bars, they were also very stiff (though not quite so). This saw will probably end up being a little overbuilt, but with my history of breaking tools, I'm not concerned about it. Next move is to make the hardware!
As a sidenote, this morning I ran in an "un-race", the 42nd Tradition Run 5k with my crazy Canadian friend graham. I'm the one with the green hat. We elected to run back down the course for a nice round 10k.
Saturday, January 22, 2011
Clamp Improvement
I keep meaning to toss this up here, but then forgetting. I saw these leather clamp pads on Lee Valley a couple months ago, and decided to do one better by just gluing some scrap leather bits to my clamp faces. They work great, I haven't marred a piece of wood since I put them on, and I don't have to fuss with spacer blocks. I think they also marginally increase friction.
Wednesday, January 19, 2011
Dimensioning Some Stock
I just ordered a frame saw blade with rip filed teeth from highlandwoodworking.com, so I figured I could start preparing the frame pieces for when it gets here. I took a decent sized plainsawn Maple plank from the backyard, split it down the middle to make two quartersawn pieces, and roughly hewed the edges straight.
Following that, I clamped the pieces to my bench and hit the edges with the scrub plane first, then my #5. The blade in the #5 is in need of a sharpening, the surface it's leaving behind is beginning to resemble that left by a toothed blade. Fine for my framesaw, but I prefer a smooth finish on most of my pieces. I might also take the opportunity to reduce the camber in the blade now that I have a dedicated scrub plane.
After that, I went ahead and re-scrubbed the faces and then evened them out with the #5.
I discovered a little bit of flame in these boards. Subtle, but pleasant to look at.
Unfortunately, after I did all this work I pulled out a tape measure and did some arithmetic, and I'm pretty sure these are too short to work for the stretchers of the frame based on the length of the blade. I'll have to hunt up some other decent wood. I suppose I could even use pine, since these pieces will be under compression, and that would lighten things up a bit besides. I might raid the pallet stack at the auto body shop down the street.
Monday, January 17, 2011
Shooting Board and My First Dovetail Project
The shooting board was made by gluing up another panel as in the previous post about the subject, gluing and finish nailing them together, and nailing the fence on. I also applied some Ultra High Molecular Weight (slippery) tape to the part the plane rides on. It's very handy to have, it makes squaring up and fine tuning the length of boards much easier.

For my first dovetail project (I've cut a dozen dovetails before on scraps) I decided to go for a simple box that I can use to transport tools or the like. I started by cutting the stock to length, shooting the ends, and removing the tongues on the long edges (these boards came to me ship-lapped). To remove the tongues I split/cut them off with a knife, then planed the edges square.
After that, I marked off the baselines with my knife marking gauge. Next step was to lay out the tails, not that it did me much good. I think I hit the line twice on the whole box. They still work fine, but they don't look as nice.


Saw, coping saw, then chisel to the baseline.

You can see the advantage to using a marking gauge with a knife on this soft pine in these pins. The baselines look fine once the joint is assembled, but if you look at the endgrain, you can see that it's all torn up.


I started losing my patience trying to get the edges of the bottom boards to match up so I could glue them into a panel and set the bottom inside the frame. I ended up just nailing the boards to the bottom with some cut nails that I saved when I helped pull out an old hardwood floor over a year ago.


When I was cutting the pins on the first end board, I cut to the wrong side of the line so they are very sloppy. I corrected the issue on the other end, but they still aren't spectacular. The nailed-on bottom and a couple of judiciously placed finish nails have the whole thing more-or-less ship shape. It's good enough to lug some hammers around in anyways.
For my first dovetail project (I've cut a dozen dovetails before on scraps) I decided to go for a simple box that I can use to transport tools or the like. I started by cutting the stock to length, shooting the ends, and removing the tongues on the long edges (these boards came to me ship-lapped). To remove the tongues I split/cut them off with a knife, then planed the edges square.
After that, I marked off the baselines with my knife marking gauge. Next step was to lay out the tails, not that it did me much good. I think I hit the line twice on the whole box. They still work fine, but they don't look as nice.
Saw, coping saw, then chisel to the baseline.
You can see the advantage to using a marking gauge with a knife on this soft pine in these pins. The baselines look fine once the joint is assembled, but if you look at the endgrain, you can see that it's all torn up.
I started losing my patience trying to get the edges of the bottom boards to match up so I could glue them into a panel and set the bottom inside the frame. I ended up just nailing the boards to the bottom with some cut nails that I saved when I helped pull out an old hardwood floor over a year ago.
When I was cutting the pins on the first end board, I cut to the wrong side of the line so they are very sloppy. I corrected the issue on the other end, but they still aren't spectacular. The nailed-on bottom and a couple of judiciously placed finish nails have the whole thing more-or-less ship shape. It's good enough to lug some hammers around in anyways.
Sunday, December 19, 2010
Planes and Ice
My Stanley Bailey #5 that I mentioned in a previous post got a new knob the other night. I cut a chunk of Maple, drilled it and countersunk it, then shaved it down with my knife to a good grip. It's a large knob, but my have large hands so it's fitting to have a large knob. (har har). I couldn't find a screw or threaded rod at the hardware store that matched the plane, so I used the old bent bolt, which is working fine. I gave it a heavy coat of Formby's Danish Oil Finish, and it's good to go.

The water in the backyard has been making interesting ice forms the last couple weeks.

Here's a quick video showing my new Lee Valley scrub plane that I just got a couple days ago. I have it set to take 1mm shavings off of this semi-green Maple board, and it really chews boards down fast. It's definitely a workout to use, and my shoulders aren't quite used to it yet, but it's far faster and easier than using my #5. The fit and finish on this plane is very good. The tote came a little loose, but I gave the screws half a turn each and everything is tight. It took 60 seconds to get the iron razor sharp, and I was planing within minutes of opening the box.
I also got a Veritas Wonder Dog, which I like, but it doesn't fit in my 3/4" dog holes. I'm going to have to get a 13/16" bit to slightly enlarge the holes so the dog will go in easily. It's possible that the wood of my bench top has shrunk slightly since I brought it down to the basement, but the dog was a tight fit even in a dog hole I bored just a few days ago.
The water in the backyard has been making interesting ice forms the last couple weeks.
Here's a quick video showing my new Lee Valley scrub plane that I just got a couple days ago. I have it set to take 1mm shavings off of this semi-green Maple board, and it really chews boards down fast. It's definitely a workout to use, and my shoulders aren't quite used to it yet, but it's far faster and easier than using my #5. The fit and finish on this plane is very good. The tote came a little loose, but I gave the screws half a turn each and everything is tight. It took 60 seconds to get the iron razor sharp, and I was planing within minutes of opening the box.
I also got a Veritas Wonder Dog, which I like, but it doesn't fit in my 3/4" dog holes. I'm going to have to get a 13/16" bit to slightly enlarge the holes so the dog will go in easily. It's possible that the wood of my bench top has shrunk slightly since I brought it down to the basement, but the dog was a tight fit even in a dog hole I bored just a few days ago.
Sunday, December 12, 2010
Wednesday, December 08, 2010
Friday, December 03, 2010
Marking Gauge
This marking gauge came out of my backyard. I started with a small Maple log, split it in half, hewed it to a rough board with my axe, then set it aside for a month. I brought it downstairs, planed it square and smoothed it out. I wanted a project to use my new mortise chisels on, so I decided to make this marking gauge based on the one that I saw on the page "Woodworking In Vietnam". Turns out this is also a classical French design, which I learned on some other woodworking page somewhere out there.
I wasn't sure whether I wanted a pin or a knife, so I made both out of a couple of small finish nails. I tried them out on a piece of scrap and decided I prefer the knife.
The jaws on my bit brace can't close tight enough to grab the tiny drill bit I needed to drill the pilot hole for the knife, so I tried using some pine jaws in the brace. Not enough friction, so I dug up the pin vise, which worked like a charm.
The finished gauge works well enough for me. The beam isn't perfectly square to the fence, but it does the job. I'm putting on a few coats of Formby's "Tung Oil Finish" to finish it up, and I'll call it done.
Subscribe to:
Posts (Atom)