Wednesday, January 19, 2011

Dimensioning Some Stock


I just ordered a frame saw blade with rip filed teeth from highlandwoodworking.com, so I figured I could start preparing the frame pieces for when it gets here. I took a decent sized plainsawn Maple plank from the backyard, split it down the middle to make two quartersawn pieces, and roughly hewed the edges straight.

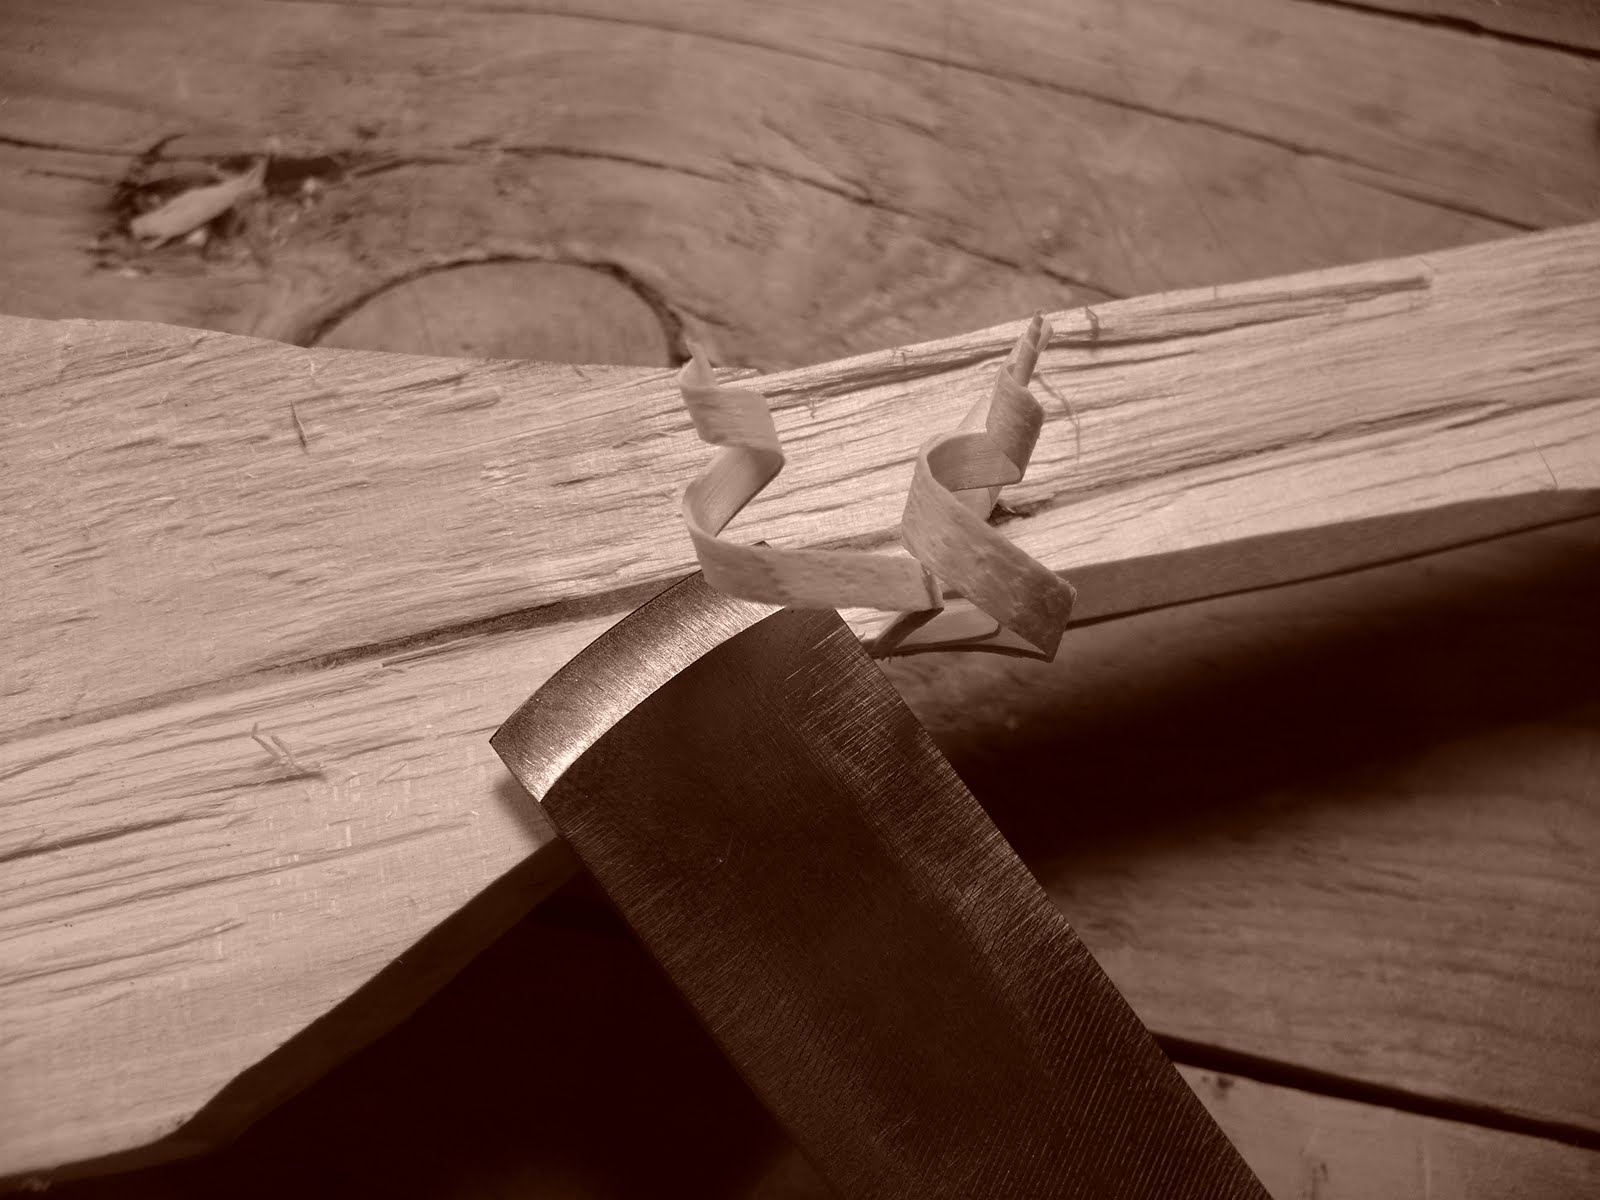
Following that, I clamped the pieces to my bench and hit the edges with the scrub plane first, then my #5. The blade in the #5 is in need of a sharpening, the surface it's leaving behind is beginning to resemble that left by a toothed blade. Fine for my framesaw, but I prefer a smooth finish on most of my pieces. I might also take the opportunity to reduce the camber in the blade now that I have a dedicated scrub plane.


After that, I went ahead and re-scrubbed the faces and then evened them out with the #5.


I discovered a little bit of flame in these boards. Subtle, but pleasant to look at.


Unfortunately, after I did all this work I pulled out a tape measure and did some arithmetic, and I'm pretty sure these are too short to work for the stretchers of the frame based on the length of the blade. I'll have to hunt up some other decent wood. I suppose I could even use pine, since these pieces will be under compression, and that would lighten things up a bit besides. I might raid the pallet stack at the auto body shop down the street.

Monday, January 17, 2011

Shooting Board and My First Dovetail Project

The shooting board was made by gluing up another panel as in the previous post about the subject, gluing and finish nailing them together, and nailing the fence on. I also applied some Ultra High Molecular Weight (slippery) tape to the part the plane rides on. It's very handy to have, it makes squaring up and fine tuning the length of boards much easier.


For my first dovetail project (I've cut a dozen dovetails before on scraps) I decided to go for a simple box that I can use to transport tools or the like. I started by cutting the stock to length, shooting the ends, and removing the tongues on the long edges (these boards came to me ship-lapped). To remove the tongues I split/cut them off with a knife, then planed the edges square.

After that, I marked off the baselines with my knife marking gauge. Next step was to lay out the tails, not that it did me much good. I think I hit the line twice on the whole box. They still work fine, but they don't look as nice.


Saw, coping saw, then chisel to the baseline.

You can see the advantage to using a marking gauge with a knife on this soft pine in these pins. The baselines look fine once the joint is assembled, but if you look at the endgrain, you can see that it's all torn up.

I started losing my patience trying to get the edges of the bottom boards to match up so I could glue them into a panel and set the bottom inside the frame. I ended up just nailing the boards to the bottom with some cut nails that I saved when I helped pull out an old hardwood floor over a year ago.


When I was cutting the pins on the first end board, I cut to the wrong side of the line so they are very sloppy. I corrected the issue on the other end, but they still aren't spectacular. The nailed-on bottom and a couple of judiciously placed finish nails have the whole thing more-or-less ship shape. It's good enough to lug some hammers around in anyways.

Sunday, January 09, 2011

Yosemite


We went to visit Yosemite today, it was a beautiful park, and we were lucky with a very dramatic sunset.


Friday, January 07, 2011

Away For A Few Days

For the 7 loyal (maybe more like "occasional") followers of this blog, I thought I would post up saying that I don't expect to be posting anything for the next week, not that I'm in the habit of posting incredibly frequently anyways.

I'm in the air over Texas as I write this, on my way to Fresno to visit with one or two of my good friends that were on my team in AmeriCorps NCCC last year. I will then be flying to Reno, Nevada, where I will take a bus to a tiny school in the middle of a high desert called Deep Springs. I will be spending a few days there touring the school and being interviewed. I'm hoping to be accepted, but it's a very competitive group of 45 young men, of which only about 13 will be admitted.

Sorry for not having any pictures. I don't like reading blog posts without pictures. Unfortunately, the in flight wifi doesn't seem to want to let me upload pictures. Se la vie.

Saturday, January 01, 2011

Happy New Year!

This morning (actually this afternoon) when I woke up I finished up my new saw bench that I started yesterday before joining my friends to celebrate the holiday. The top is a chunk of Maple that I cut out of the back yard, barely flattened and thicknessed (as is evident by the 1/2" variation in thickness across the length of the board), and planed a bevel on the long edges to give the legs a bit of splay. The legs are rough sawn Hemlock scraps from work, which I brought home along with some 1x ship lap Pine and a couple Yellow Pine floor boards the other day (photo below). The stretchers are some of that ship lap Pine. I screwed it all together, and did a pretty rough job of the whole thing. I wasn't interested in making a nice piece of furniture, just something that would make sawing a bit easier. For my imaginary future shop I'm planning on a nicer one, maybe with some real joints, but this will do for now.


I decided to use some of the ship lap Pine to make a shooting board so that I could finally easily square my crosscuts. First step is to plane the joint edges of the boards together. I learned this trick on some other blog (Correction: I was reading back through Roy Underhill's The Woodwright's Guide and realized I saw it in there), but it's such a good trick it's worth repeating in one more place. By planing the edges together, any out-of-squareness will be transferred equally, so the boards will still go together perfectly flat. In fact, to get a bit more face grain for glue up, it might be a good idea to put a pretty good angle on there.

My first experiment rubbing boards together for glue up. You just apply glue and rub the boards back and forth a few times. As long as you did a good job planing, the edges will suction together just like two wet plates of glass. In the picture I have the board perched on the Veritas Wonder Dog because I'm too afraid to set it down against a wall, for fear of the joint coming out of line. I just used regular Elmer's white glue because that's what I have right now, and I don't expect to be getting my shooting board wet.

The fence for the shooting board is next to the glued up panel. It's a rip off of one of the Yellow Pine boards, planed square.


Monday, December 27, 2010

Happy Holidays!


Above is an interesting plane that is on the mantel at my grandparent's house, and I've been paying closer and closer attention to it over the last few years as I've been getting deeper into woodworking. This Christmas while we were there, I pulled it apart and took some detail photographs. One interesting detail of the construction that I noticed this time around is the dovetailed piece that forms the front of the mouth. The curved sole leads me to believe that this is probably for the inside of barrels or some other concave surface. The rather small mouth opening indicates that it is for taking fine shavings. Because of the age of the wood, it's difficult to determine what species the plane is made from, but I think the mouth could be oak or ash. The main body almost seems like some sort of soft wood based on the grain. I have some pictures of the interior of the mouth/blade holding area as well as the maker's mark that I might post up later. It's pretty typical, but I still find it interesting.

Below are some holiday spoons for friends and family with a 6" rule. All Paper Birch from the same tree. I used a pattern for the two smaller spoons, based on Barn the spoon's suggestions, made from a piece of flexible plastic. First I axed and then smoothed with my knife a crank into a half stick, traced the pattern, axed to the pattern, and then carved it all out from there. The final step in roughing these is to hollow the bowl. It's very quick work with the green Birch, but it's a bit soft and flexible for these small eating spoons, much better for the larger utensils that can be left thicker.
Tips for Spooners-Barn the Spoon


Below is some quarter sawn Maple from a stump in the backyard. These are about 5-6" wide, and about 4-6/4 thick. Plenty hefty! I very approximately flattened and thicknessed these boards with my new Lee Valley scrub, and couldn't resist finishing one out to see what the grain would look like.

The radial flecks are a little more subtle than something like Oak, but I think it's very pleasant to look at.

It's amazing how stable quartersawn lumber is! I know that's the whole idea, but it's still really cool to me. I took these straight out of the back yard and moved them down to the basement mere feet from the furnace for over a week, and haven't seen a single check or any suggestion of twist or cupping. I did paint the ends as a precaution, but I've also been storing them upright. I found a webpage somewhere (one of the few I didn't bookmark...yarg!) that suggested storing lumber on end instead of horizontally prevented almost all checking. I haven't done enough experimenting to verify that, but it sure hasn't hurt!

Sunday, December 19, 2010

Planes and Ice

 My Stanley Bailey #5 that I mentioned in a previous post got a new knob the other night. I cut a chunk of Maple, drilled it and countersunk it, then shaved it down with my knife to a good grip. It's a large knob, but my have large hands so it's fitting to have a large knob. (har har). I couldn't find a screw or threaded rod at the hardware store that matched the plane, so I used the old bent bolt, which is working fine. I gave it a heavy coat of Formby's Danish Oil Finish, and it's good to go.


The water in the backyard has been making interesting ice forms the last couple weeks.

Here's a quick video showing my new Lee Valley scrub plane that I just got a couple days ago. I have it set to take 1mm shavings off of this semi-green Maple board, and it really chews boards down fast. It's definitely a workout to use, and my shoulders aren't quite used to it yet, but it's far faster and easier than using my #5. The fit and finish on this plane is very good. The tote came a little loose, but I gave the screws half a turn each and everything is tight. It took 60 seconds to get the iron razor sharp, and I was planing within minutes of opening the box.

I also got a Veritas Wonder Dog, which I like, but it doesn't fit in my 3/4" dog holes. I'm going to have to get a 13/16" bit to slightly enlarge the holes so the dog will go in easily. It's possible that the wood of my bench top has shrunk slightly since I brought it down to the basement, but the dog was a tight fit even in a dog hole I bored just a few days ago.

Wednesday, December 08, 2010

Miniature Scrub Plane


The iron made from a dull old file.

Broke my coping saw while ripping the Maple plane body :(


Friday, December 03, 2010

Marking Gauge


This marking gauge came out of my backyard. I started with a small Maple log, split it in half, hewed it to a rough board with my axe, then set it aside for a month. I brought it downstairs, planed it square and smoothed it out. I wanted a project to use my new mortise chisels on, so I decided to make this marking gauge based on the one that I saw on the page "Woodworking In Vietnam". Turns out this is also a classical French design, which I learned on some other woodworking page somewhere out there.

I wasn't sure whether I wanted a pin or a knife, so I made both out of a couple of small finish nails. I tried them out on a piece of scrap and decided I prefer the knife.

The jaws on my bit brace can't close tight enough to grab the tiny drill bit I needed to drill the pilot hole for the knife, so I tried using some pine jaws in the brace. Not enough friction, so I dug up the pin vise, which worked like a charm.

The finished gauge works well enough for me. The beam isn't perfectly square to the fence, but it does the job. I'm putting on a few coats of Formby's "Tung Oil Finish" to finish it up, and I'll call it done.