Thursday, December 02, 2010

A Few New Things


Last week I finished a new work bench, made from pressure treated 6x6s. I had them laying around, so I used them. This bench is super massive. The top felt it weighed 80-100 pounds alone.

I don't have any vises, but I installed a plane stop and I bought a couple clamps that can traverse the width of the top with room to spare. This allows me to hold wood adequately in the three major planes of orientation. In the photo I have a piece of scrap pine clamped for edge planing while I was tuning my planes.

The difficulty I'm having is clamping a piece flat to the top of the bench, such as when I want to chisel a mortise into the face of a piece. The trouble is that my clamps are too long to orient the excess bar below the bench, and orienting the excess bar above the bench puts them right in the way of my mallet. I drilled dog holes that will accept traditional holdfasts, but haven't decided whether I actually want to shell out for a pair or deal with what I have.

After I finished assembling my bench in my basement room, I started getting my planes in shape. I have had these for quite some time, but without an effective way to hold my work, they were almost useless (except for trimming a door once). With the bench, though, they become very useful. I got a piece of glass, some spray adhesive, and a bunch of cheap sandpaper in 100 and 220. I also picked up some 400, 600, and 1200 wet/dry. I polished the soles, lapped the blades, sharpened them up.

The knob on my Bailey #5 is broken, and the screw is bent, so I need to make a replacement and try to find a suitable screw. I haven't got around to it yet, but I have been using it without any problem. I put a slight camber on the blade, and I have it set heavy to try to take the place of a scrub plane. Using it is a bit of a workout, but it does the job. I have one of my block planes set as a heavy smoother, and the other block plane set as a fine smoother. I polished rubbed some paste wax onto all the polished metal to try to reduce rusting caused by my grimy mitts.


With these three planes I can take a rough hewn board down to a glassy smooth, square board.


Leevalley is running a great deal on some mortise chisels. Only through the 15th, so if you want some, get on it quick. I lightly flattened the backs, polished up the bevels, and they cut great.


I felt a hankering for a couple of longer knives, so I ordered a Mora #2 and a Lauri 4.8" blade from Ben's Backwoods. I love the Mora #1 blade shape and length, but the handle is too small to be comfortable for heavy cutting. The #2 has a nice big handle.

Wednesday, November 17, 2010

Feather Sticks and Spoons

Feather sticks and spoons are both great projects for practicing knife skills and building wrist and grip strength. Feather sticks in particular are great for practicing controlled cutting. A good feather stick requires a strong grip on the knife, one that allows for cutting long strips of wood at a consistent depth. For a good article discussing feather sticks, check out this one by Jim Dillard over at Ben's Backwoods. I disagree with is assertion that a highly polished edge is essential. I make what I consider to be perfectly adequate feather sticks with an edge straight off of a carborundum pocket stone. I honestly can't tell much, if any, performance difference in wood carving between that and my more highly polished and stropped edges.

Spoons are good for practicing a wide range of cuts, and getting even more comfortable with your knife. Starting with large, powerful cuts for initial shaping, then ending with fine, controlled cuts.


(This is two feather sticks)

Mmmm! Delicious!

Sunday, November 14, 2010

Chopping Block


I made this chopping block a little while ago. This is a good way to get a stable chopping block if you don't have any large rounds of wood. This block is something like a block I once saw, but in reverse. In the version that I saw, the fork was a large tree crotch, and there was a single smaller limb used to complete the tripod.

In this version, I used a Maple log about 6-8" diameter, as well as a forked limb about 1" diameter, all longer than I wanted them to finish. I bored a 1" hole in the larger log at an eye-balled angle, chopped down the forked limb to fit the mortise, and stuck it together. Using a tape measure (any old stick with some notches in it would work), I measured a good height for a chopping block, then transferred it to the block and sawed off the excess. I stood it up, sawed the top off approximately level, and it was done.

Because it's a tripod, it will be stable on almost any surface. It's also small and light enough (and can be taken apart) to travel in a car. It is very stable and stiff, though, if you orient your heavy blows so that the force will travel down the large leg.

I'm not sure, but I think I probably found the original inspiration over on the bodger's forum.


Wednesday, November 03, 2010

Finished Spoons

These are a couple of spoons I finished recently. I feel like I'm beginning to really grasp combining the function of the spoon with an elegant shape. There are a couple of things I can see I will probably cringe at down the road, but I'm happy with these.

These are both made from Maple limbs. The one on the bottom was a curved limb, hence the gradual curve in the whole spoon. The one on top was a straight limb that I formed with the axe to the right angle. I have been eating with the bottom spoon for the last couple of weeks, and I'm very pleased with the mouth-feel and ergonomics.

These are finished with a knife, the inside of the bowls with a Mora small circumference hook knife. I would like to get a shallow gouge to finish out the inside of the bowls, to leave fewer ridges.

The bottom spoon has a few coats of Mineral Oil, but I don't know how well it actually took. I might try a trick I read of in which the spoon is seeped in boiling milk for a few hours. The idea is that the milk proteins invade the surface of the spoon and form a water resistant barrier.


Sunday, October 24, 2010

Axe Handle Patterns

I made up a few patterns from some of my favorite axe handles today. I used 1/8" luan plywood. I traced the handles onto the plywood, chopped them into chunks with the saw, then I took them down to the line with the coping saw. I trimmed them all the way down and finished them up with the knife.

Then I took a chunk of the hickory log I had and trimmed it roughly to a plank. Then I used the pattern off my big Snow and Nealley and traced a monster handle onto it. I can't wait to hang a head on this handle, but I have to wait a couple months for it to dry out.


Tuesday, October 05, 2010

Spoons

Today I didn't have any work, which is a good thing because I've been feeling terrible and running a low grade fever most of the day, on top of getting very little useful sleep because I was focusing on avoiding throwing up.

So I started collecting parts for a bike trailer I'm going to build, based on the plans here:
http://www.carryfreedom.com/bamboo.html

So far I have the metal sheet for the brackets mostly cut, still need to drill holes, make a couple more cuts, and bend them to shape.
Two cracked bicycle wheels that I got for free at the bike shop.

I'm not decided yet on what I'm going to use for the frame, but probably maple sticks from the yard.

I also pulled myself together today and carved some spoons. I started out with the small Maple log you see here:


I split it out into four useful blanks, then cut two of them in half for eating spoons. The other two were meant for serving spoons. One of the blanks had a catastrophic crack in it that I didn't see until I was mostly done rough shaping it with the axe, so that went into the fire pile. The first step in shaping is done with the axe, and a saw to trim off the edges of the blank close to my pencil marks (which are drawn freehanded in whatever shape appeals to me).


After roughing with the axe, I carve out the bowls with my hook knife.


After that, I attack them with the regular knife. This is the stage in which everything is refined and the block of wood actually starts to resemble a proper utensil. I leave everything a bit thick at this point, so that once the wood dries out I can shave it down to finished dimensions.


Here are the tools I used, except the saw which was used for four cuts. Gransfors Bruks Swedish Carving Axe, Mora 510 (with a bit of a regrind to saber convex bevel), and a Mora small radius hook knife. This is about $210 worth of tools, but $180 of that is in the axe. For a much more reasonable tool kit, you can replace the axe with almost any axe. Below you can see two $15-20 axe heads rehandled with the same pattern handle as the carving axe (Cold Steel Norse Hawk, and a modern Collins hatchet). For even less, you can get great old hatchets for $5 and grind a fresh edge on them, slap a new handle on, and you are good to go. That would bring a basic spoon carving kit to about $50 or less, brand new!


The fin on the back is something new for me that I've been trying to figure out for a while (I'm embarrassed to say, now that I've figured it out). Deceptively simple to apply, and it adds quite a lot of strength to the spoon in the weakest part. You might also notice the grain of the spoons. I was careful to align the rings in the spoons so that the spoons would be strongest in the direction that force is applied, similar to aligning the grain of an axe handle.

The curve of the spoon, with the bowl canted in relation to the handle, makes the spoon tremendously easier to eat out of compared to a straight spoon.

Total time so far on these spoons is a bit under 4 hours, which includes 10-15 minutes sharpening my axe. That works out to 45-50 minutes per spoon so far. I'll probably spend another 20-60 minutes on each spoon to finish them out, so if I round up, each spoon will take about 2 hours of work by the end.

Nice Find! Hickory Log

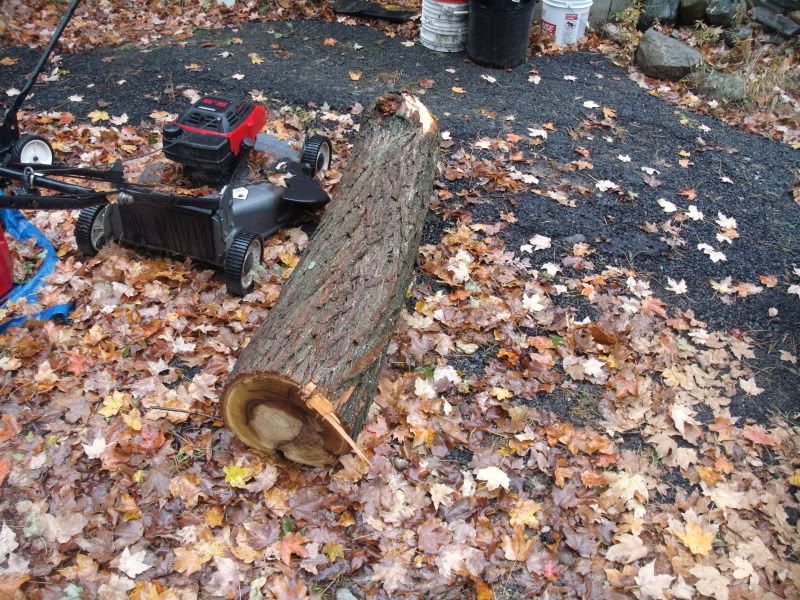
I saw that a large hickory tree had fallen down recently when I went for a run yesterday. It had fallen into a small backroad, and the state had come by and cut it up into 4-6 foot logs. I returned last night with the car, and brought this one home. It looks to be less than two or three weeks since it fell. Very wet. This log weighs at least 200 pounds, probably closer to 300. It's unbelievably heavy! I might split it up and set it aside for some axe handles or maybe some spoons.


Saturday, October 02, 2010

Tiny Bucksaw

This morning I made this tiny bucksaw out of some scrap pine from the barn. 15/16" thick or so, and then I ripped it down to suitable width. The blade is 12" long, held in place with copper wire from building site scraps I pulled over a year ago and set aside. It's really cute in person, and works surprisingly well.

Finished the Work Horse

Finished up my workhorse last night, and broke one of my chiseling mallet/clubs pounding it together. It's quite sturdy and stable, even without a second horizontal rail.


Broke A Chisel

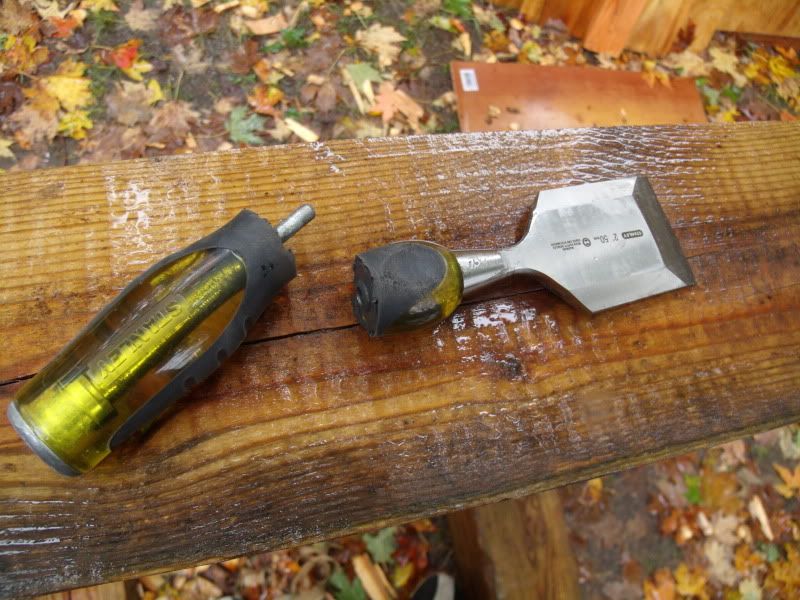
Managed to break this 2" chisel I was using to chop the mortises on my workhorse. I think I probably created a stress fracture in the plastic when I was bashing it with a hammer. Then I was hitting it really hard with a wood club, and the fracture broke all the way through. What appeared to be a solid steel tang going all the way through the handle is actually two parts, the junction of which is where the handle broke.

I took it back to Ace Hardware and they gave me a new one. I'll have to be a bit more gentle with this one.